Follow these steps to create an ICmatch group profile that will show up on the Team Up page.
1. Meet the completion criteria for your member profile.
Your individual member profile page (when logged into My Account) needs to show 100% in the circle chart (which moves to the end of page when you’ve completed). To get 100% you need to answer the first popup matching questions, post a memoji or photo, and answer a few more questions. At the top of the Match for Free page is an orange button that links to a page that describes in detail how to complete your member profile.
2. Know your responsibilities.
Read and adhere to the Terms of Use. As a group coordinator, we ask you to commit to respond within 30 days to prospective members who contact you. When you are in a chat box ready to respond, you’ll see a button to the top right labeled Pre-fab responses. These are described in a FAQ. These can make it easier to politely decline for those who are not a good fit. If you know you’ll be preoccupied or away, you can assign another member the group coordinator role for a while.
3. Find Groups tab.
After your member profile is complete, when logged in, your My Account page will show a Groups tab on the left. Click into that.
4. Create a group description.
Inside your groups page, you’ll find a form that will let you create a group. You can load a photo and write a 100-word description. If you already have clear ideas and want to include much more information, create a forming community page for free on ic.org. There you can write much more. From your ic.org page, you can point back to ICmatch, so that people who find you from that page can look at your member profiles.
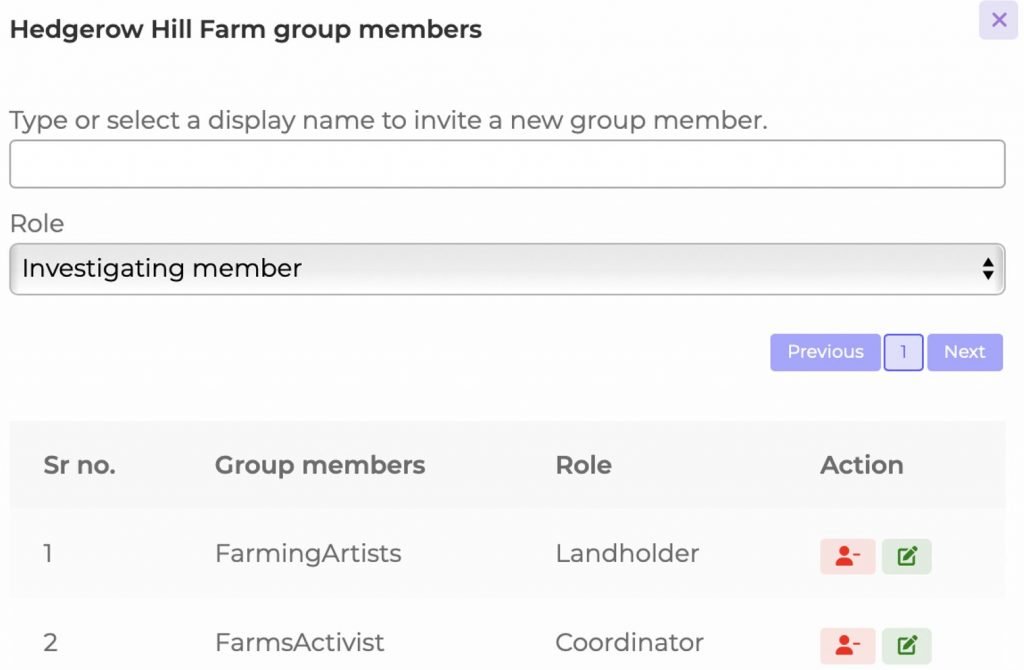
5. Invite members to your group.
When you find people who seem compatible, you can invite them to join your group. Go into the Groups tab of your My Account page. Click on edit/add participants. You’ll see a form like the image below. Use the first field to identify the member you want to invite. Use the second field to indicate what type of member you are inviting them to be. Below that will be a list of the members in your group.
6. Tell people where to find you.
Feel free to invite people from other online platforms to check out your ICmatch group profile. This eases up your work! Instead of describing your people and your group members on the other platforms, you can copy and paste your group profile URL so they have access to the information about people in your group. To do this, go to the Team Up page, find your group, then copy the URL to paste into your invitation message in an email or other platform. That will allow others to go directly to your group without searching.
7. Indicate your communication channel.
Tell your group members if there is a group chat format you all have decided to use. We suggest you use whatever the majority of your group members are already familiar with. It could help if the group coordinator’s individual member profile indicates the platform you’ve chosen. You can write that in the Technology category.
8. Explore options.
As a group coordinator, you can still be a member of other groups. These will show up as Linked groups (see below). If you decide you no longer want to be coordinator of the group you created, do everybody a favor and let them know. If others want to keep the group together, you can assign another coordinator and ignore the group, even though you will still show up as a member. If you decide to delete the group profile, you have the option to create a new one. In this case, let the others know that someone else must take over as coordinator of the group. They will need to make note of the display names and invite everyone to the new group they create. Remind them to copy your group description and image if they want to use those in their new group description.

9. Consider subscribing.
If you decide to pay the low monthly subscription, your profile thumbnail will show up in the IC types pages you choose. Your profile thumbnail will indicate that you are a group coordinator by displaying a badge as in the example below. You can cancel your subscription at any time to stop it from renewing the next month. Members who are looking only for a specific type of community may use these pages to visually scan for members. Those seeking a group that has already begun to form a leadership team will be able to identify you by this badge.
10. Read about founders’ groups.
Read our detailed steps for how to use ICmatch resources to develop a founder’s team. We’ve studied up on what the long-lasting intentional community residents say worked when they were forming a core leadership group at the start. Check out our page on roles for founder’s group members.